How To Tie The Perfect Gift Bow
Tying a bow on a gift box isn’t rocket science. However, getting it exactly right—creating a perfect, professional-quality bow—does require a specific technique. Use the wrong technique, and you might end up with ribbon that doesn’t lay flat on the bottom of the box, meaning that the box itself won’t sit flat on any surface. Or you might leave either too much or too little ribbon on the end for tying the bow, which will either waste ribbon stock or waste time redoing the process. And if you have ribbon that is printed or glossy on only one side, you’ll likely have the wrong side featured on different parts of the box or bow.
To help you get just the right look and make the most of your custom ribbons and gift boxes, we’ve put together a detailed, step-by-step tutorial on tying the most common type of bow.
Step 1
Lay the ribbon flat across the top of the box. For one-sided or printed ribbon, you’ll want to have the printed side up, so it’s visible.
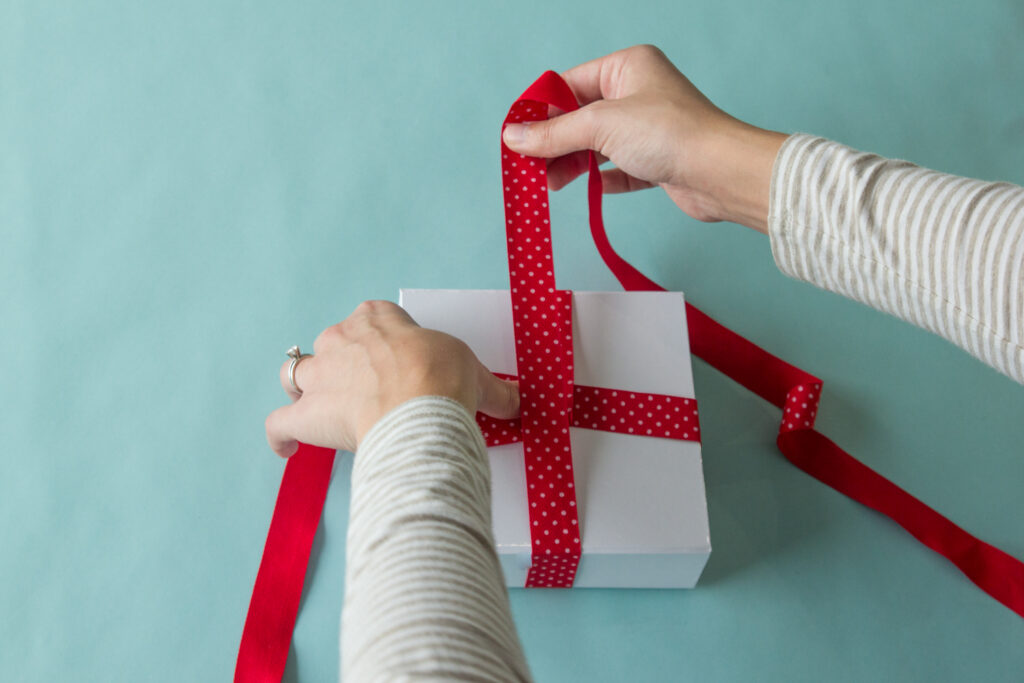
On the short end (the end of the ribbon that won’t be wrapped around the box, or the cut end if you’re working with a roll of ribbon), make sure you leave enough extra ribbon to later tie the bow. Remember that you’re measuring from the middle of the box, or the point where the bow will be tied.
You can estimate how much extra ribbon is needed by forming the shape of one-half of the bow, as shown below. It’s better to err on the long side, since you can always trim it later.
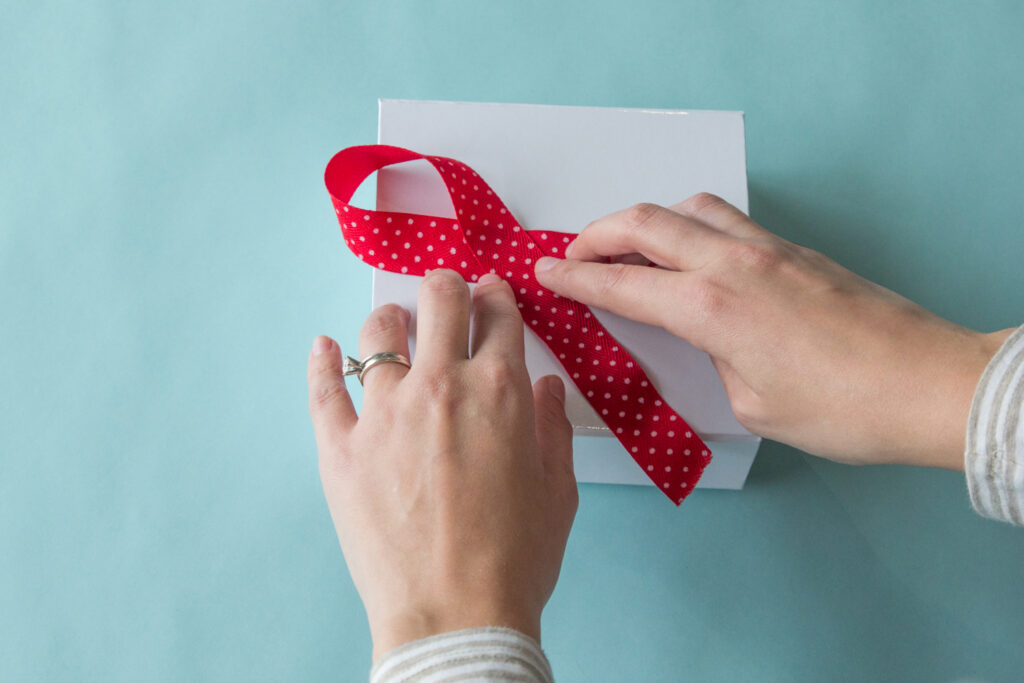
If your boxes are all the same size, you can quickly figure out exactly how much ribbon is needed, and measure out that amount each time.
Step 2
Take the roll, or the long end of the ribbon, and wrap it under the bottom of the box and back up to the top. Make sure the ribbon doesn’t get twisted, and stays flat against the box all the way around.
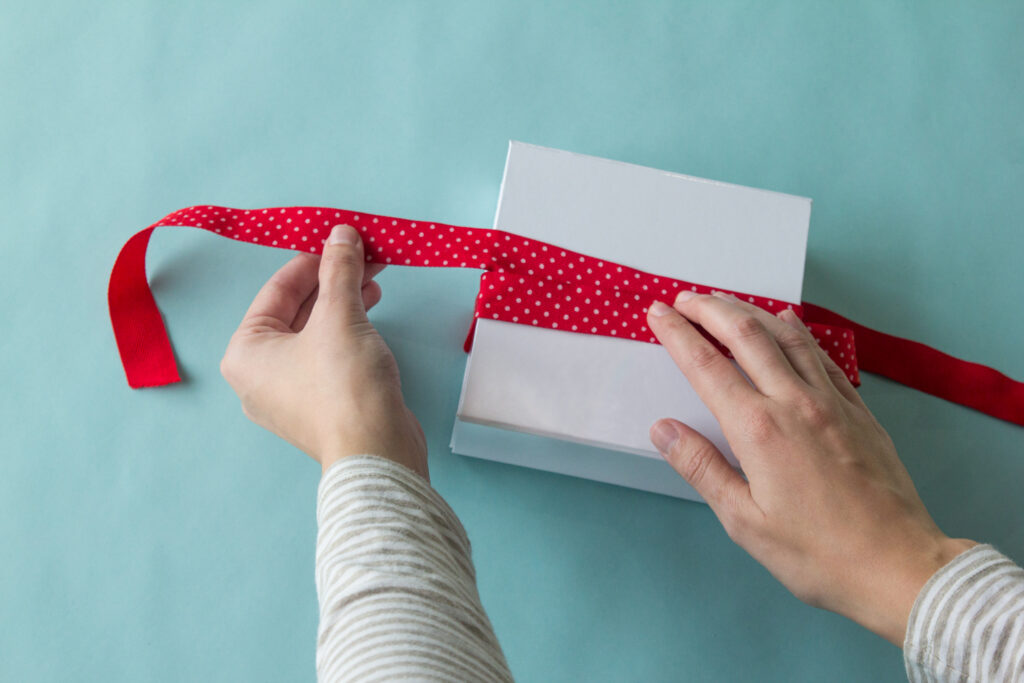
Step 3
Take the long end of the ribbon that you’ve just wrapped around the box, and use a finger to hold it in place at the point where the bow will be. Then fold/bend it at a 90-degree angle to cross over the existing path of the ribbon.
If you fold the ribbon over, what was the top side of the ribbon will now become the bottom side, facing the box itself. This isn’t a problem if you have double-sided ribbon. But if you have one-sided ribbon, you’ll need to bend the ribbon as shown (or twist it to keep the correct side up).
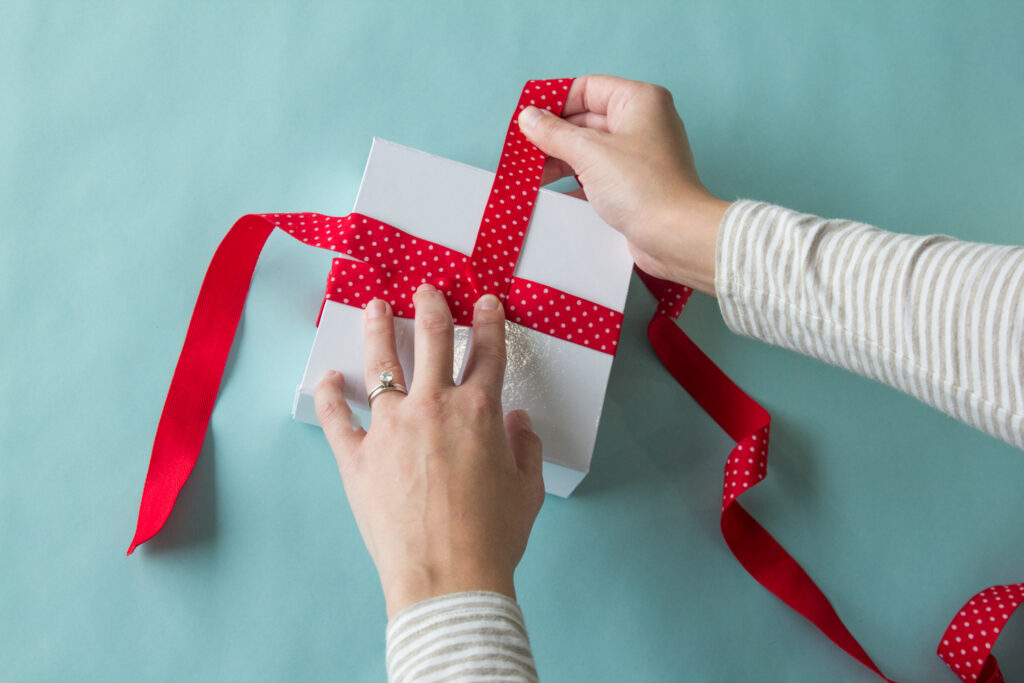
Step 4
While holding your finger on the fold/bend to keep it in place, wrap the long end of the ribbon around the box and back up to the top, where it will cross over the point of the bend (as shown below).
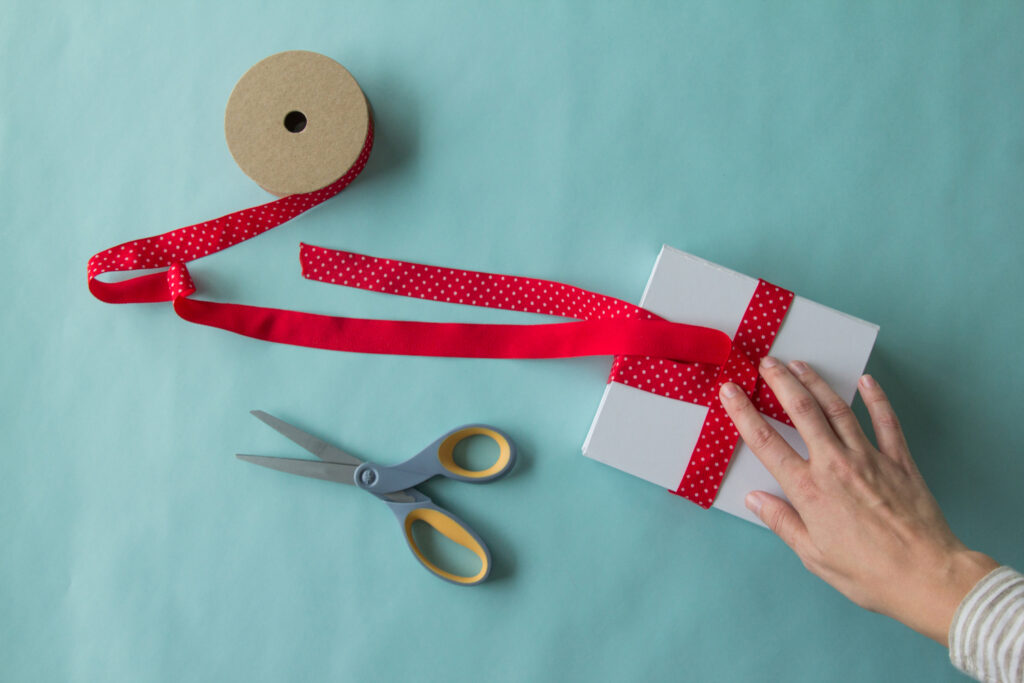
At this point, if you’re still attached to the roll or have extra ribbon on the long end, you can cut it to be roughly the same length as the short end. (We’ll continue calling them the “long” and “short” ends to differentiate between them.)
Step 5
Thread the long end of the ribbon back under the center point, beneath both the bend and the original short end of the ribbon.
Step 6
Pull both ends in opposite directions to tighten. As you can see, if you’re using one-sided ribbon, the long end will now be face-down, while the rest of the ribbon is all still face-up.
Step 7
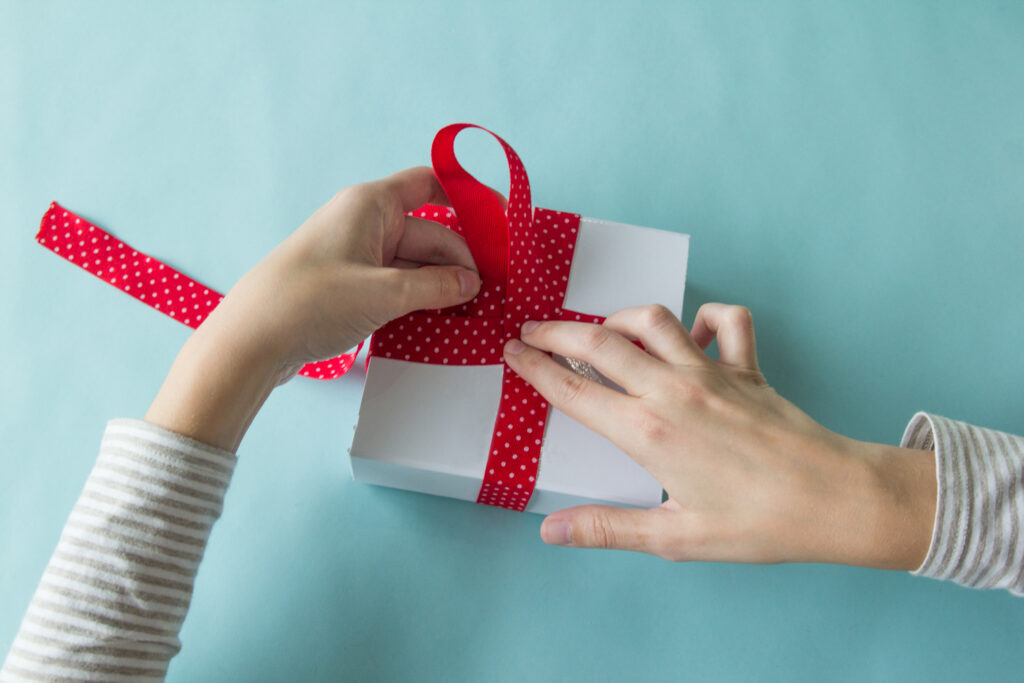
Now you’re set up to tie your bow. It doesn’t matter which side you start with if you’re using double-sided ribbon, but for one-sided ribbon you’ll want to start with the end that is face-down (what was the long end, before you trimmed it).
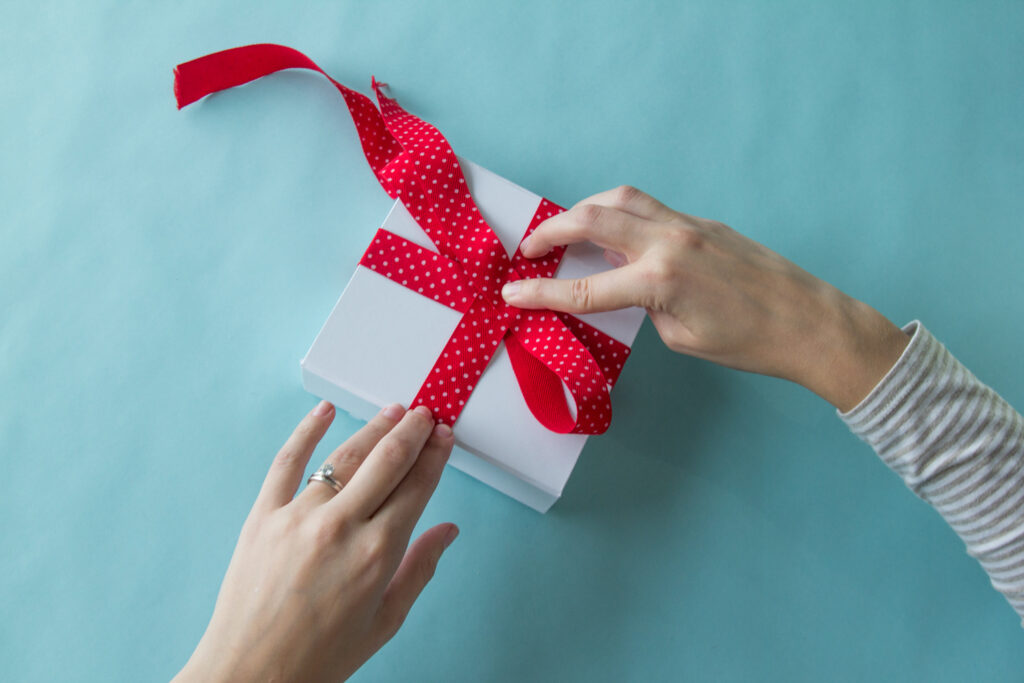
Make a loop with that end by folding it back towards the center, so that the printed side becomes the outside of the loop.
Step 8
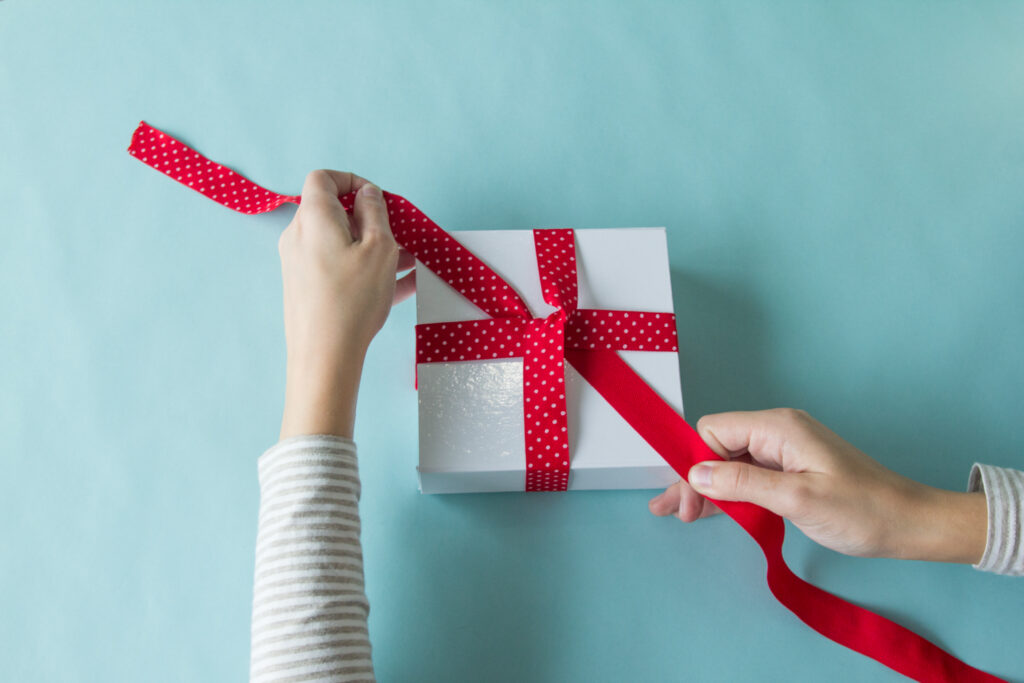
The rest is similar to tying a shoelace. Take the other end of the ribbon and wrap it loosely around the base of the loop, so that the non-printed side is facing out. This center knot is the only place on the entire package where the back side of the ribbon will be visible.
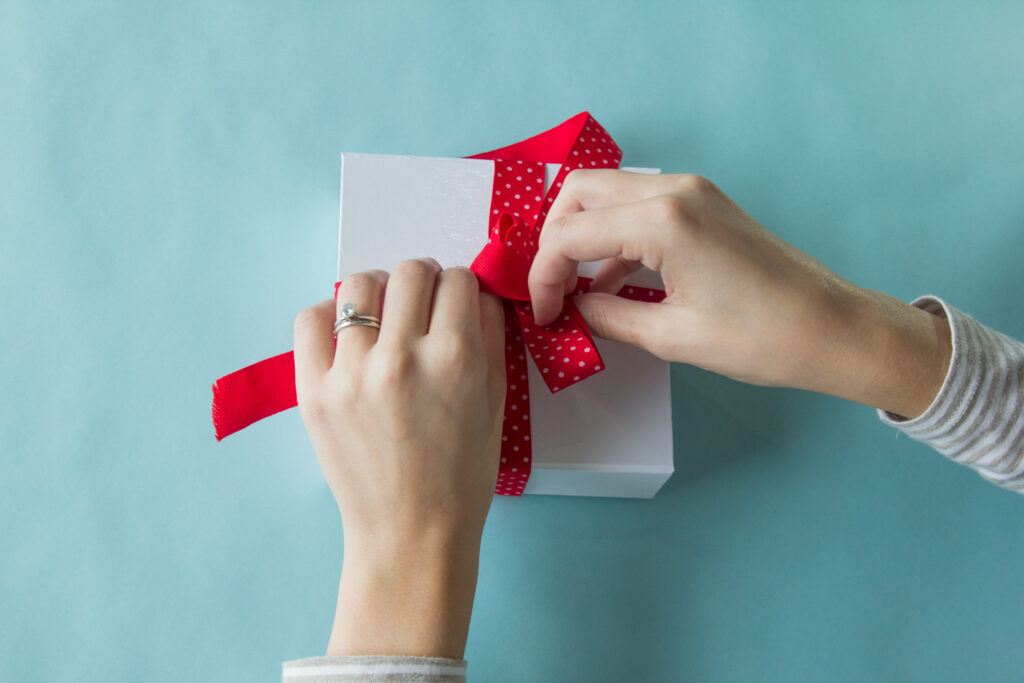
Step 9
Form the rest the bow by pulling the ribbon back under and through the wrap you just made, and then pulling both loops simultaneously to tighten the knot. Done correctly, you’ll end up with the printed side of the ribbon facing out on both loops and both tails.
You can then manually adjust the positions of the loops or tails as needed to create the look you want.
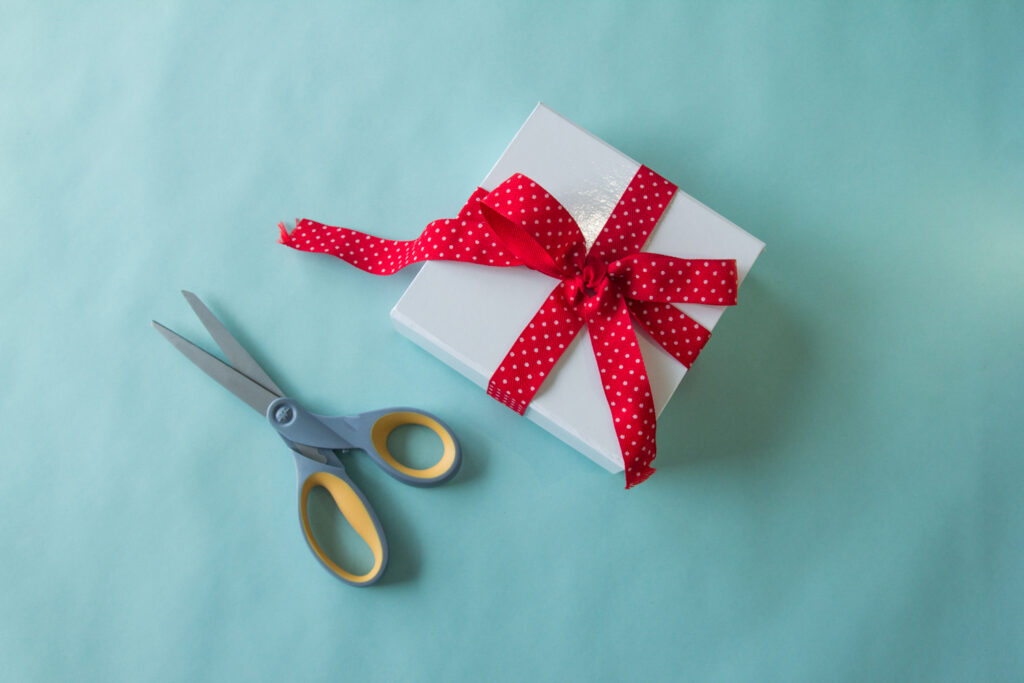
Step 10
Trim the tails to make sure they are the same length and end with the same style of cut. To make a picturesque forked end, fold the end of the tail lengthwise and then cut off the tip at an angle, towards the crease of the fold. (Angle your cut the other way, and you’ll end up with a pointed end, which is another option.)
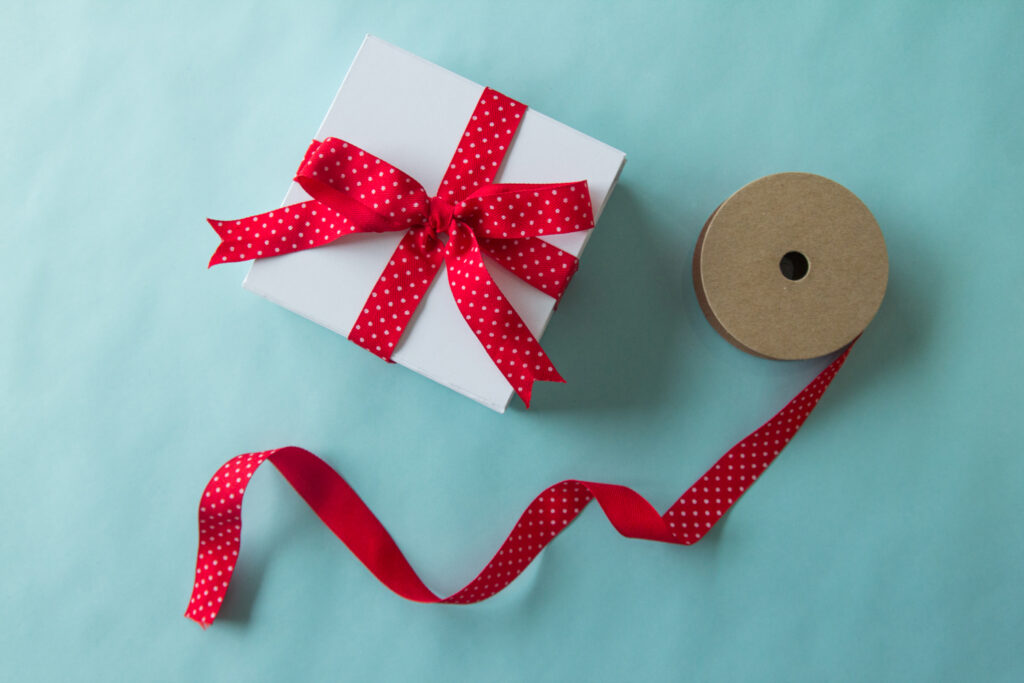
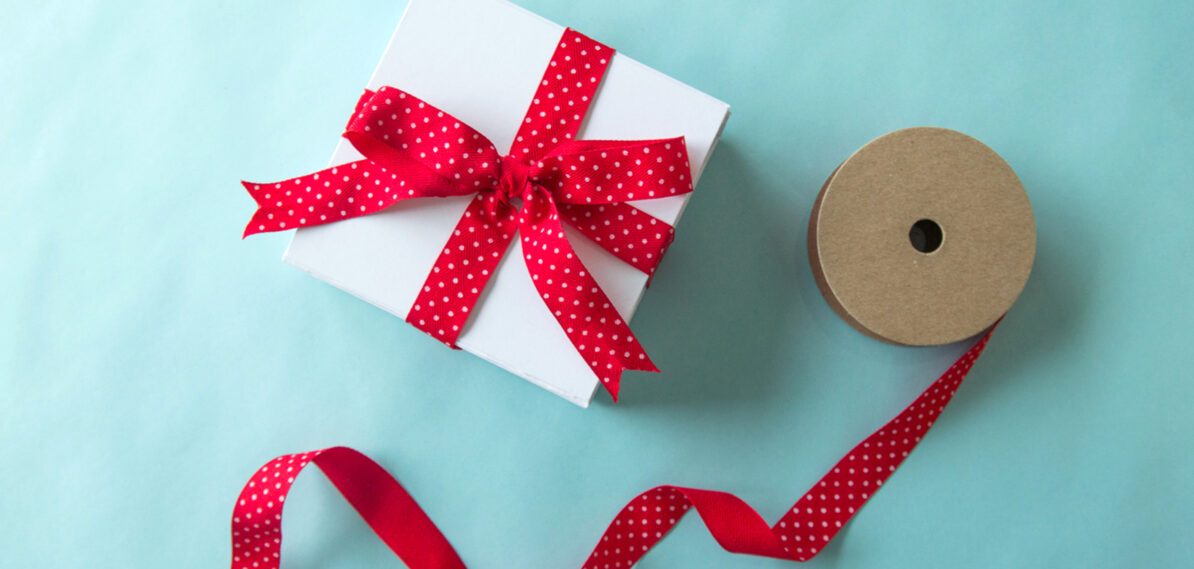
And there you have the finished result: a beautiful, symmetrical package, showing off the right side of the ribbon every time.At Impak, we help retail brands create the perfect look for their packaging with fully customized ribbons, pre-tied bows, gift boxes, gifts with purchase, printed tissue paper, and other packaging accessories. If you’d like to learn more about our services or get a free quote, please contact us.